Managing AOI
In this section, you will learn how to search, view, and zoom into existing AOIs you or your team have created. In addition, you will learn how to filter, edit, and delete an AOI.
Searching AOIs
Searching makes it easy to locate a specific AOI by name, saving you time when managing large collections of saved boundaries.
To search for an AOI, do the following:
-
Login to the platform.
-
Click the Data module, and then click the AOI Manager sub-module.
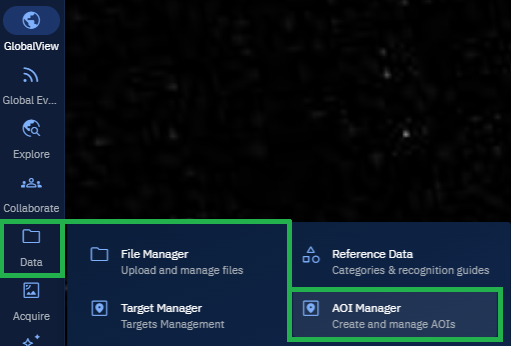
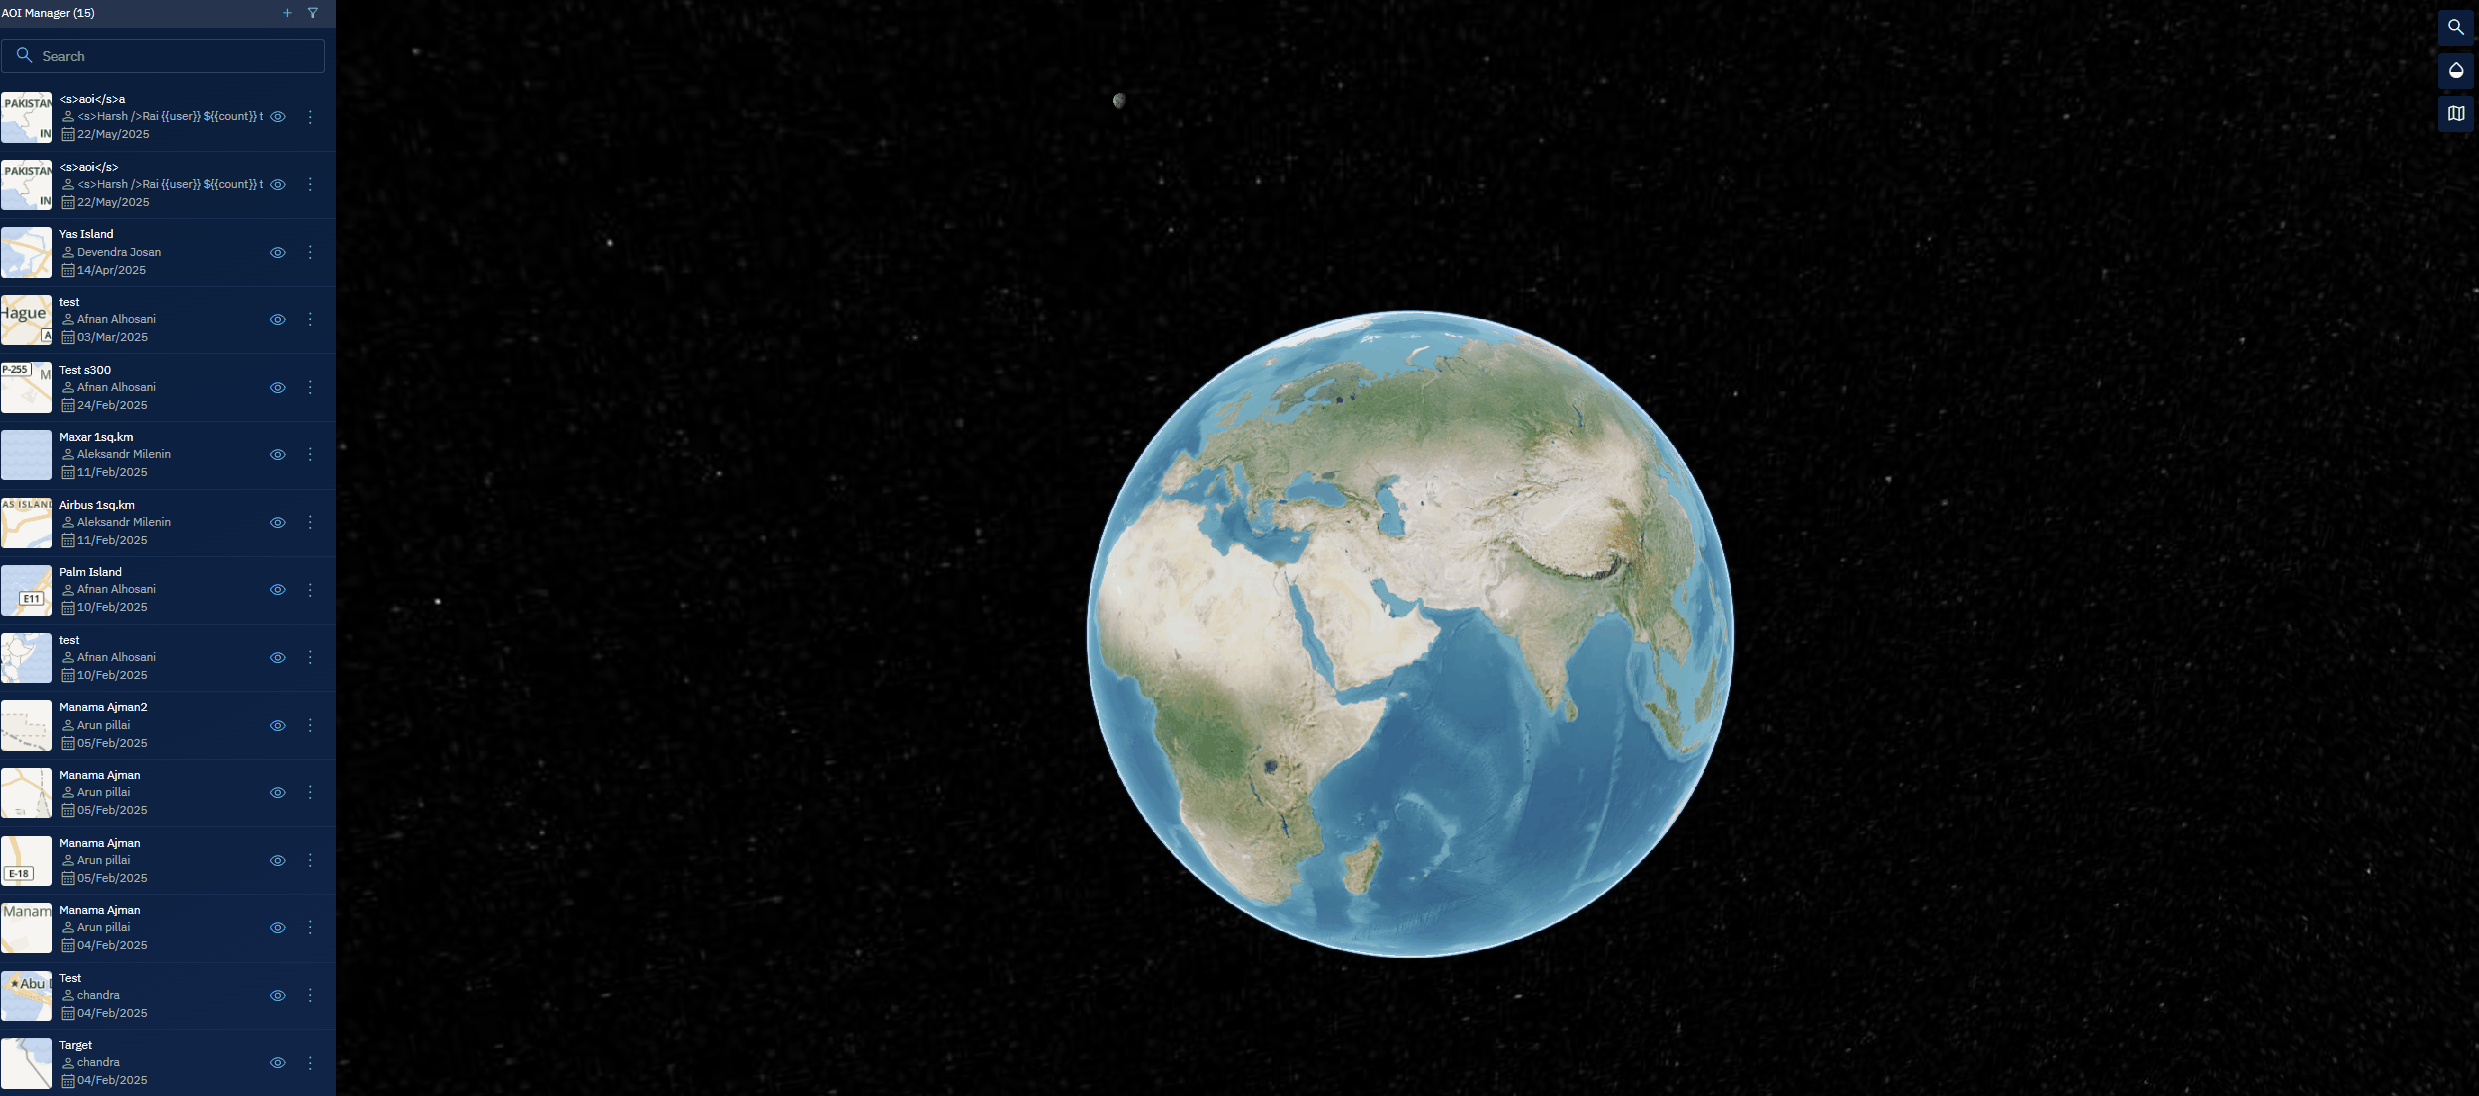
The AOI Manager page is displayed.
- In the AOI Manager panel, type the name of the AOI in the Search field.

The platform displays matching AOIs as you type.
- Locate the AOI that you want to open from the search results.
Viewing AOI Details
In this section, you will get to know how to view all the details of an AOI you have created or found through search.
Viewing details helps you confirm the boundary on the map and review important metadata like name, description, and creator information.
To view details of an AOI, do the following:
-
Login to the platform.
-
Click the Data module, and then click the AOI Manager sub-module.
The AOI Manager page is displayed.
- In the AOI Manager panel, type the name of the AOI in the Search field.

The platform displays matching AOIs as you type.
- Locate an AOI that you want to open then proceed to click the AOI name to open and view the following details:
Zooming Into an AOI
In this section, you will learn how to focus the map view directly onto the boundary of an existing AOI.
Zooming in helps you quickly inspect or analyze the area without manually navigating across the map.
To zoom into an AOI, do the following:
-
Login to the platform.
-
Click the Data module, and then click the AOI Manager sub-module.
The AOI Manager page is displayed.
-
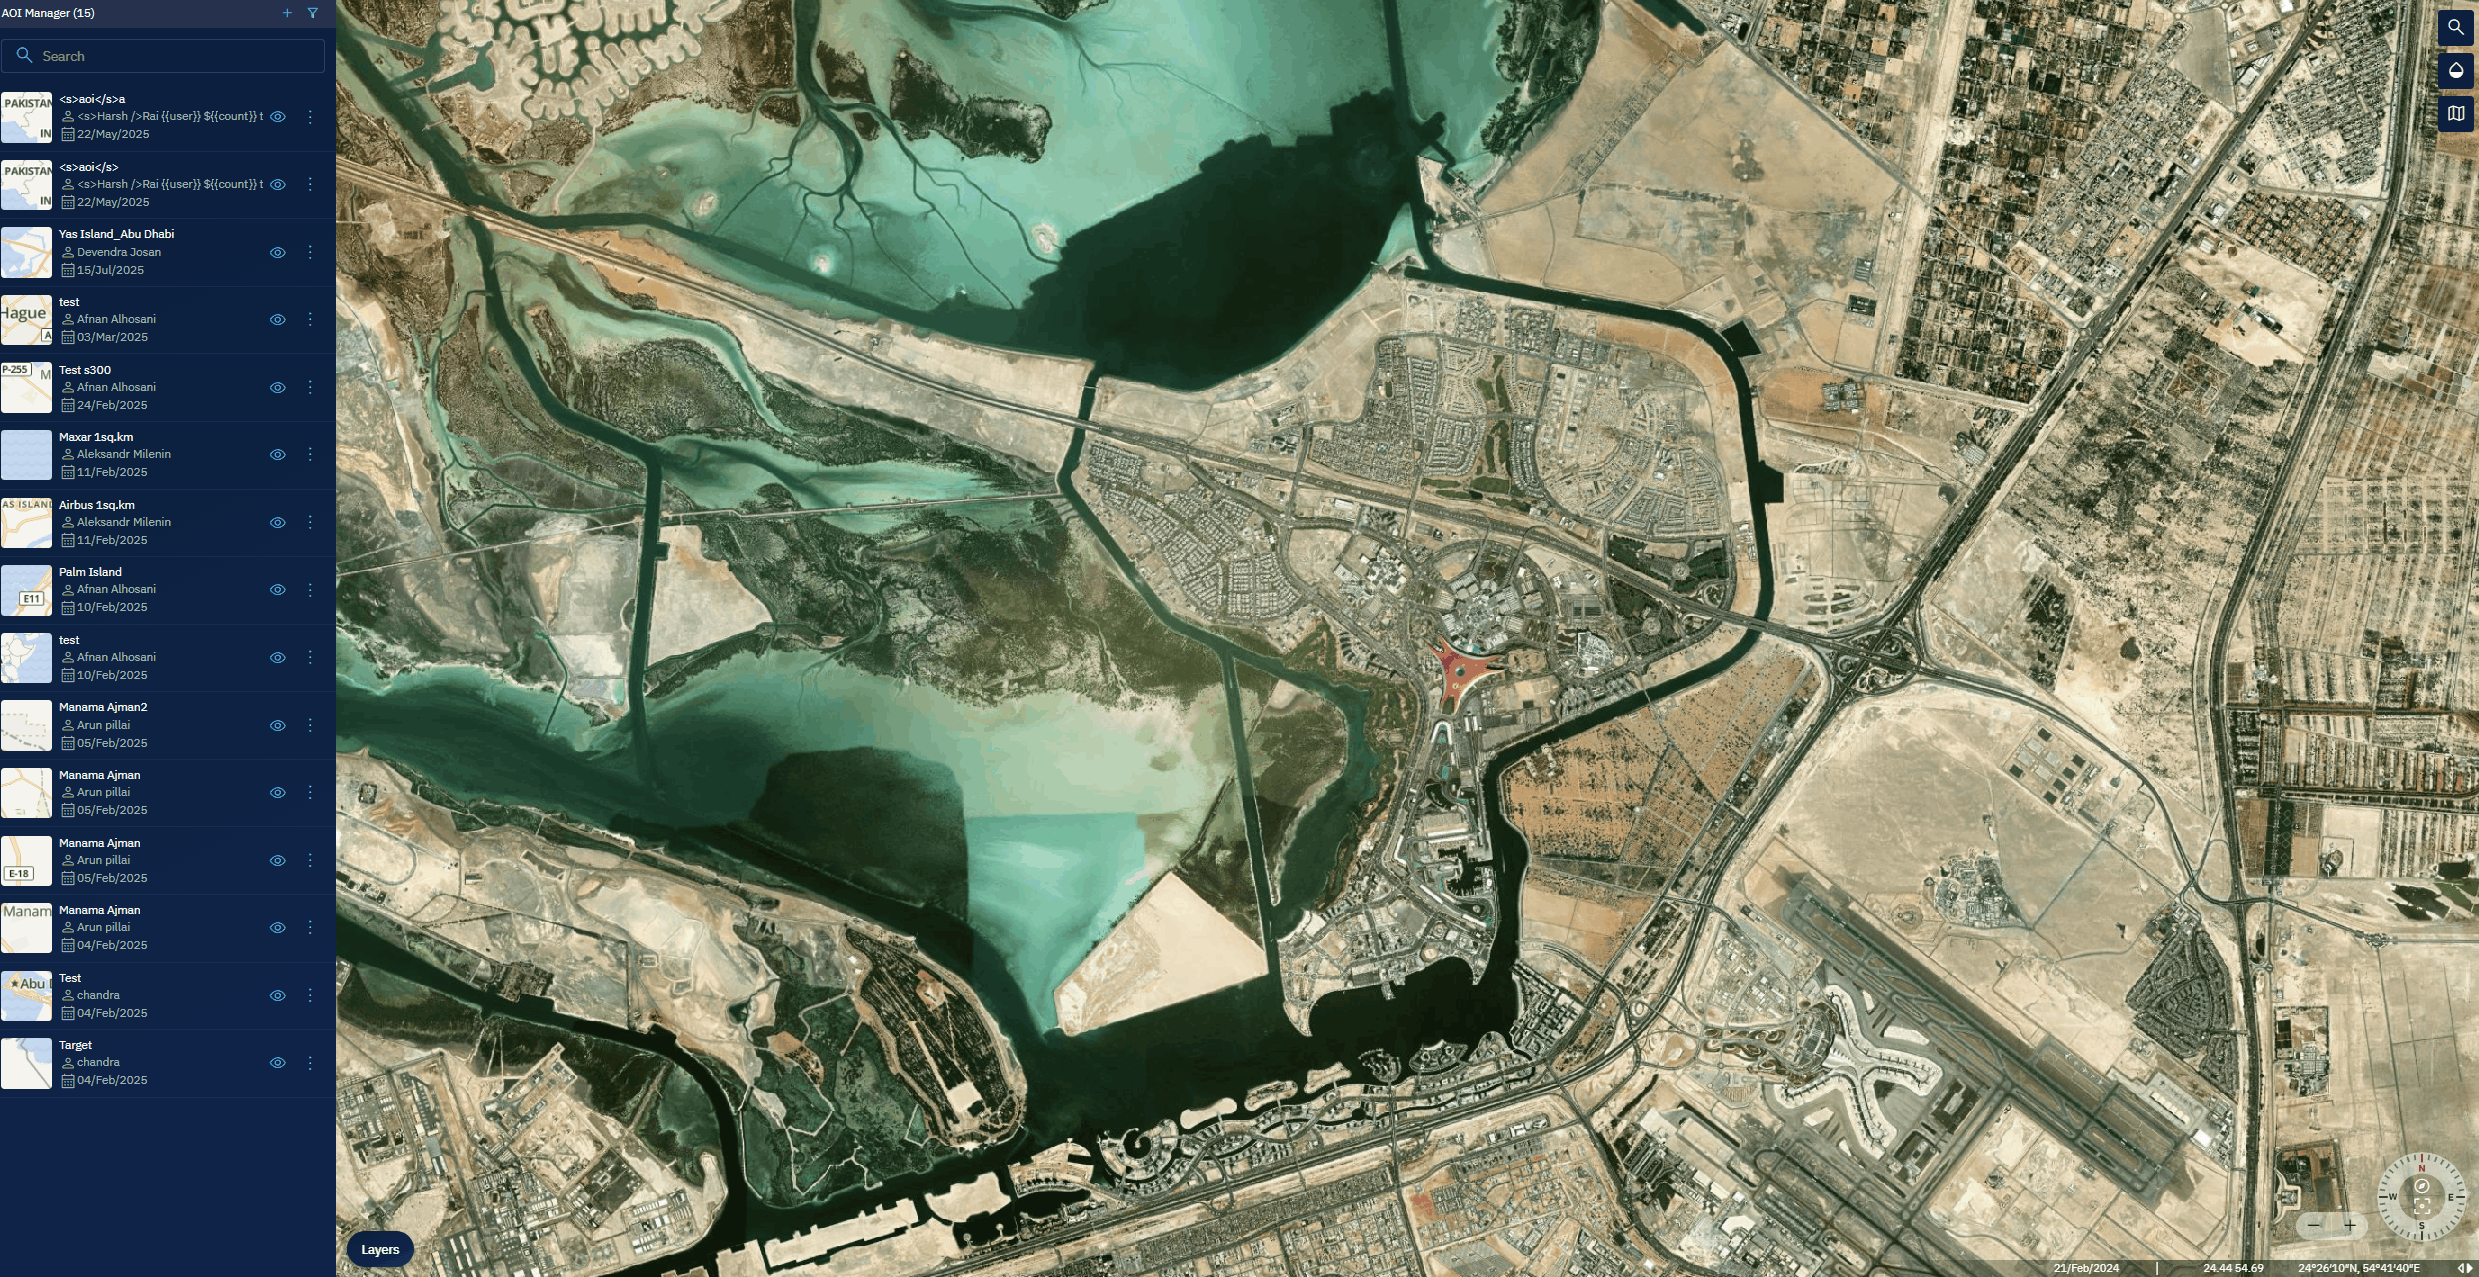
In the AOI Manager panel, locate the AOI you want to focus on.
-
Click the vertical three-dots menu next to the AOI name and then click the Zoom Into AOI option.
The map zooms to the selected AOI boundary for a clear view.
Filtering AOIs
In this section, you will get to know how to filter existing AOIs based on specific criteria.
Filtering allows you to narrow down your list of AOIs to only those that meet selected parameters, making management easier when you have many AOIs saved.
To filter AOIs, do the following:
-
Login to the platform.
-
Click the Data module, and then click the AOI Manager sub-module.
The AOI Manager page is displayed.
-
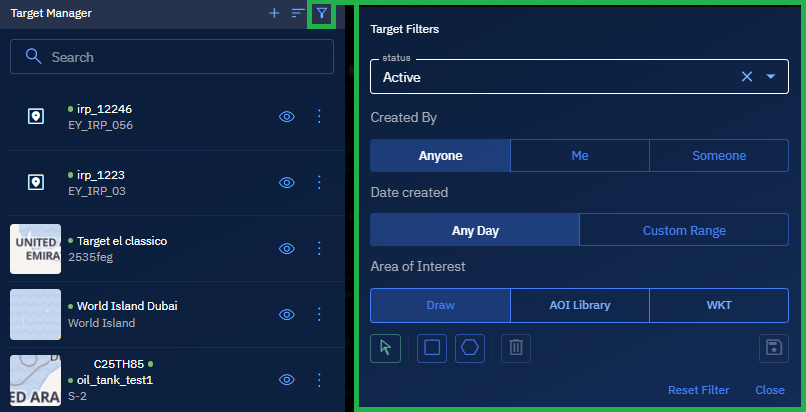
In the AOI Manager panel, click the Filter icon. The AOI Filters dialog box is displayed.
-
In the AOI Filter dialog box, do the following to filter AOIs:
4.1 Specify Who Created the Targets
-
In the Created By section, select one of the following:
-
Anyone – view all targets created by any user.
-
Me – view only targets you created.
-
Someone – opens a Select User dropdown. Select one or more specific users to view targets they created.
4.2 Filter by Date Created
-
-
In the Date Created section, select one of the following:
-
Any Day – show all targets, regardless of creation date.
-
Custom Range – opens the Start Date and End Date pickers. Set a specific date range to view only targets created within that period.
4.3 Define an Area of Interest (AOI)
-
-
In the Area of Interest section, select one of the following:
- Draw – draw a Polygon or Rectangle on the map. Displays targets within the defined area.
- AOI Library – select a saved AOI from your library to view all targets within that area.
- WKT – copy and paste WKT (Well-Known Text) coordinates to define a custom AOI.
-
Editing an AOI
In this section, you will learn how to modify an existing AOI.
Editing allows you to update the AOI boundary on the map, change its name or description, and keep your workspace organized with accurate, up-to-date information.
To edit an existing AOI, do the following:
-
Login to the platform.
-
Click the Data module, and then click the AOI Manager sub-module.
The AOI Manager page is displayed.
- In the AOI Manager panel, locate the AOI you want to edit, click the vertical three-dots menu, and then click the Edit option.
The Edit AOI page is displayed.
- In the Edit AOI page, modify the AOI name, or type a new tag or simply re-draw an AOI and then click the Save button to save your changes.

Copying WKT to Clipboard
In this section, you will get to know how to copy the Well-Known Text (WKT) representation of an AOI to your clipboard.
This format is useful for sharing the AOI boundary with other tools, systems, or team members who need a standardized text-based geometry definition.
To copy an AOI’s WKT (Well-Known Text) representation, do the following:
-
Login to the platform.
-
Click the Data module, and then click the AOI Manager sub-module.
The AOI Manager page is displayed.
- In the AOI Manager panel, locate the AOI whose geometry you want to copy, click the vertical three-dots menu next to the AOI name, and then click the Copy WKT to Clipboard option.

The platform copies the AOI’s geometry in WKT format to your clipboard, so you can use it in other tools or systems.
Deleting an AOI
In this section, you will learn how to permanently remove an AOI from your workspace.
Deleting an AOI helps you keep your list clean and relevant by removing outdated or incorrect boundaries you no longer need.
To delete an AOI, do the following:
-
Login to the platform.
-
Click the Data module, and then click the AOI Manager sub-module.
The AOI Manager page is displayed.
- In the AOI Manager panel, locate the AOI you want to remove, click the vertical three-dots menu next to the AOI name and then click the Delete option.
- Click OK to confirm the deletion in the dialog box.
The platform permanently removes the AOI from your workspace.